
You Found Your Print! Now What?
How to Find the Perfect Frame
This blog post is a collaboration with Frame it Easy and contains affiliate links. I have used Frame it Easy for years now, and have been linking to their service long before I was contacted for partnership. That’s how much I love it, and I hope this blog post helps clear up any questions you have about how to select the perfect frame!
How I Discovered Frame it Easy
As a working artist, I love the mess and journey of the creative process, and it’s incredible to send my work into the world. One thing I’m asked about often is framing. I tried offering framing in my studio, but quickly became overwhelmed with the space and logistics it took.
I searched for another option, one that was easy for my collectors, but also quality… and I discovered Frame it Easy.
The feature that first drew me to their website was the ease of ordering a quality frame in a custom size with a manageable variety of designs that fit both contemporary and traditional styles. As an artist, I work with many collectors who want to frame their work with something well-made, affordable, AND convenient (not to mention, sustainable).
Why I love it:
They have variety, but not too much. Goodbye overwhelm, hello simple, well curated selections that match both contemporary and traditional taste.
The frames are well made. I’ve ordered almost every kind they offer and each and every one has exceeded my expectations. Only once has a frame arrived damaged, and they immediately helped make it right.
They deliver to your door, with minimal assembly. Some frames require more than others, but they can all be done with common tools and a less time than it takes to drive to your nearest framer.
You can order custom sizes with ease AND affordability! Standard sizing is super convenient, but many times the piece you want to frame may just not fit well. Frame it Easy allows you customize up to ⅛” of an inch. This includes matting and double matting and as well, which is a really nice way to elevate the work.
Whether you are an artist looking to frame your work for a exhibition, or a collector wanting the perfect way to present your new artwork, I highly recommend Frame it Easy.
Let’s get to it!
How to order your frame:
Select your artwork.
I offer prints and originals both on stretched canvas and paper or rolled canvas. Both ways of presenting look amazing, it just depends on what you need in your space.
At the time of this writing, Frame it Easy isn’t offering frames for stretched canvas, so only keep reading if you are looking for the matted frame look. If you know you want that, select a print size or two down from what you want on your wall to make space for the mat and frame.
You can’t go wrong with either, but a wrapped canvas print is simply a different look than a matted paper print. Depending on whatever is already on your wall, or the look you are going for, either could be a great fit!
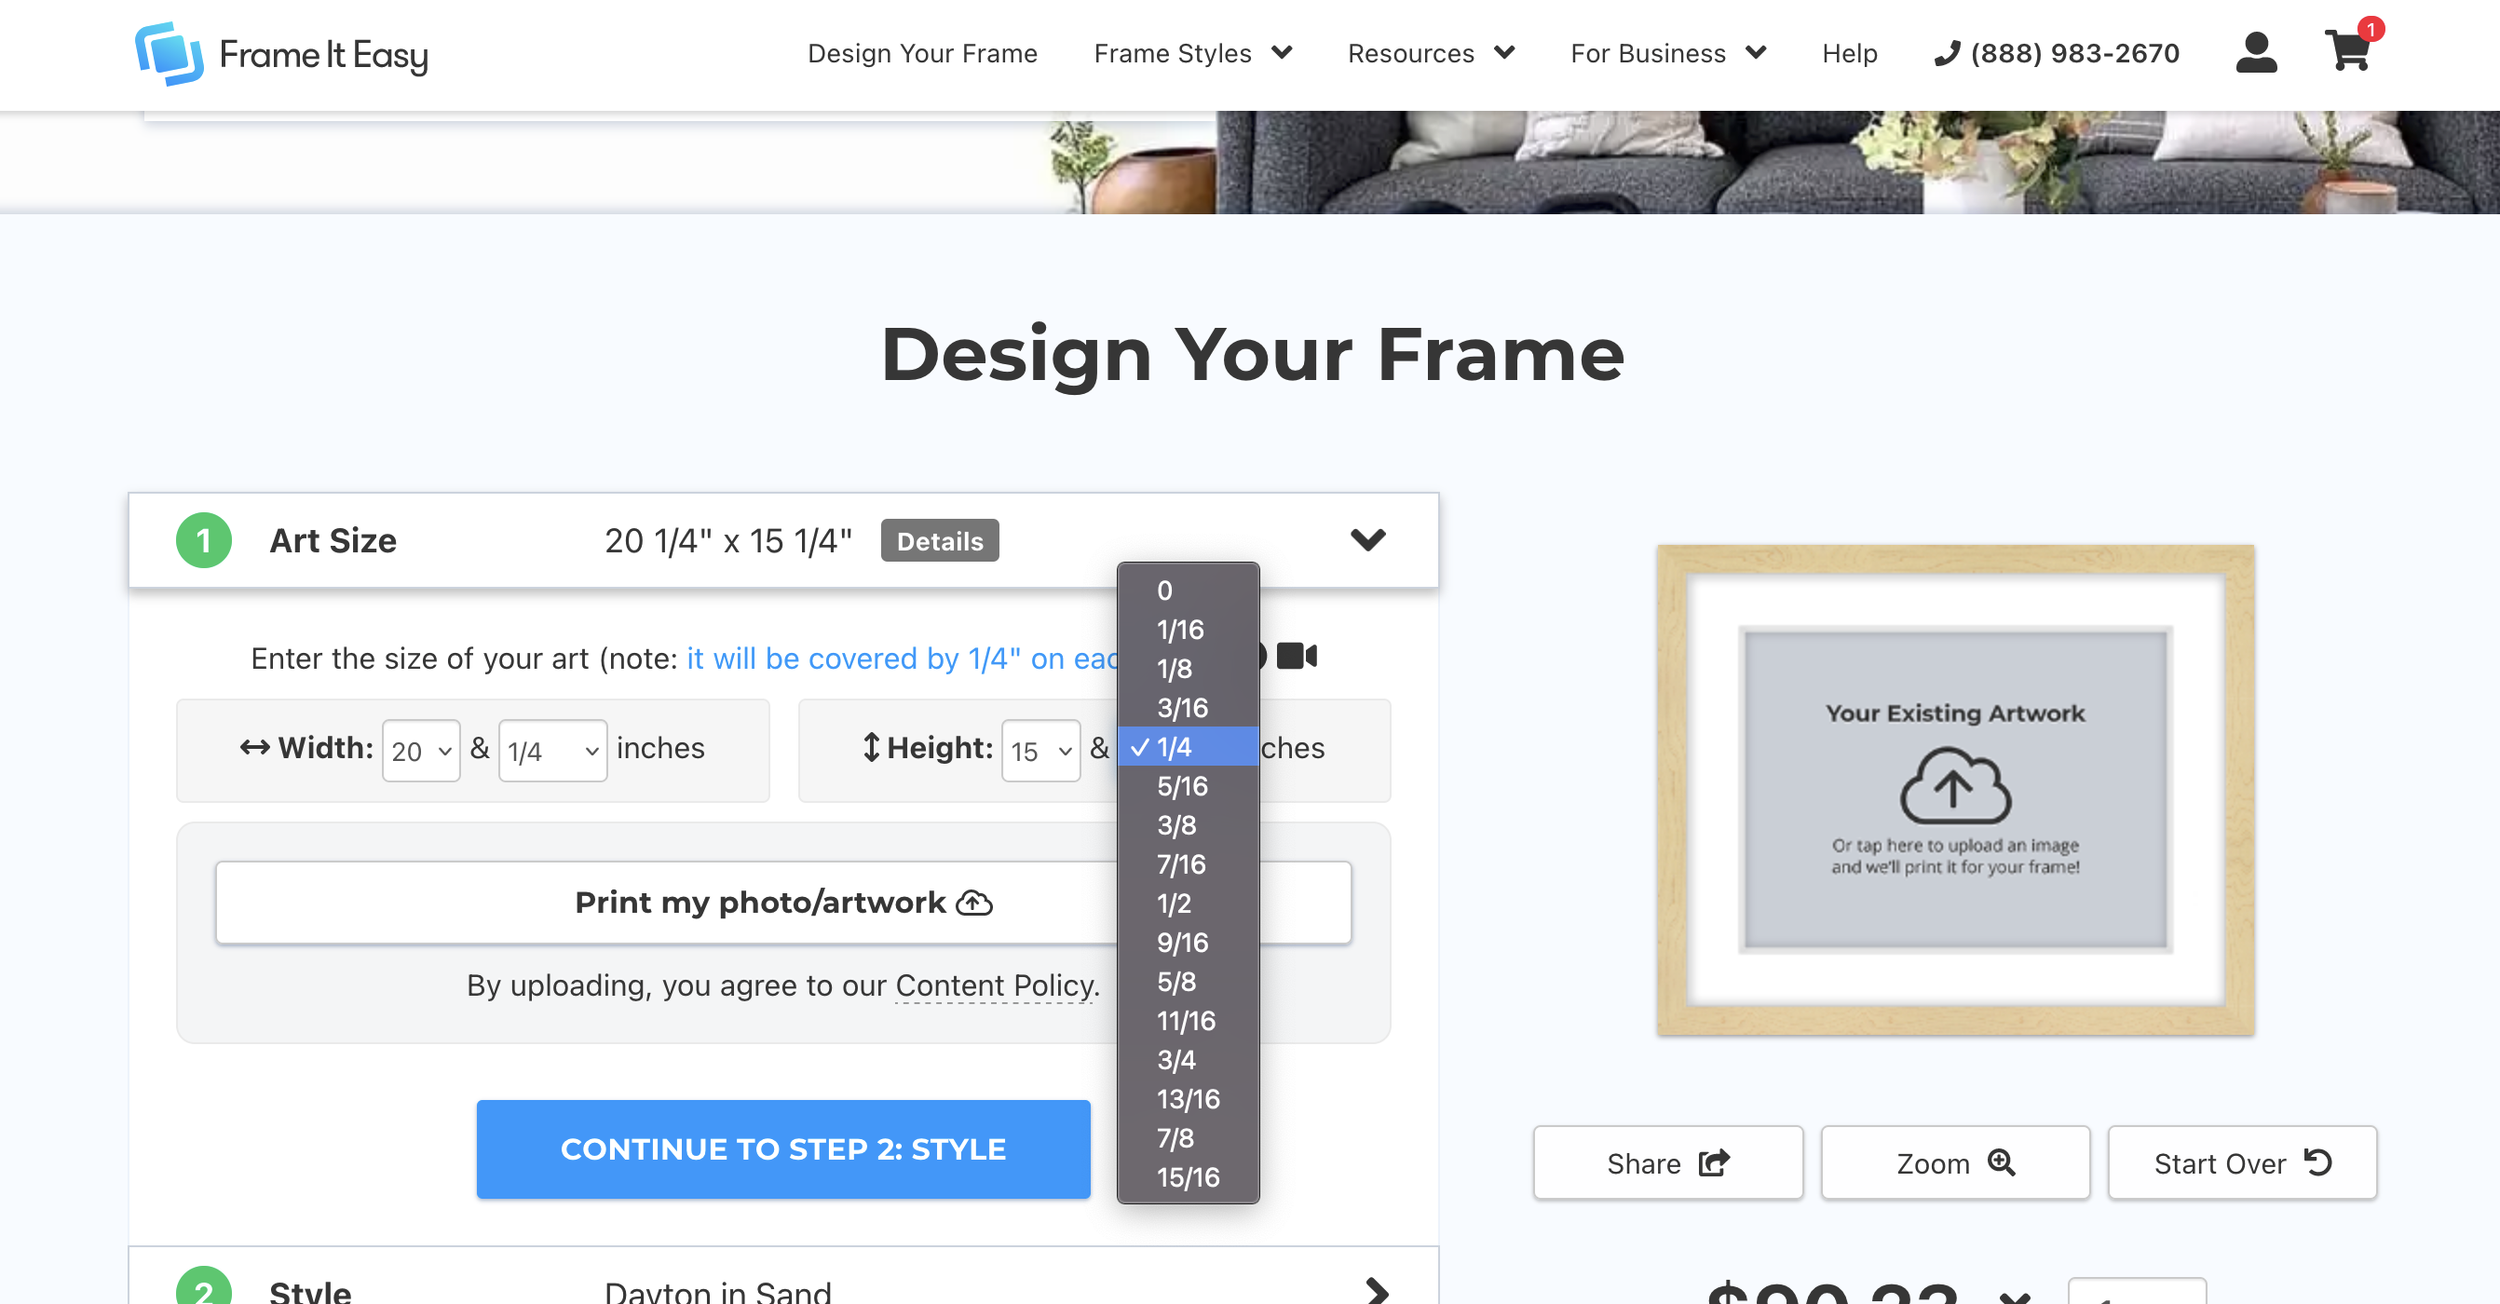
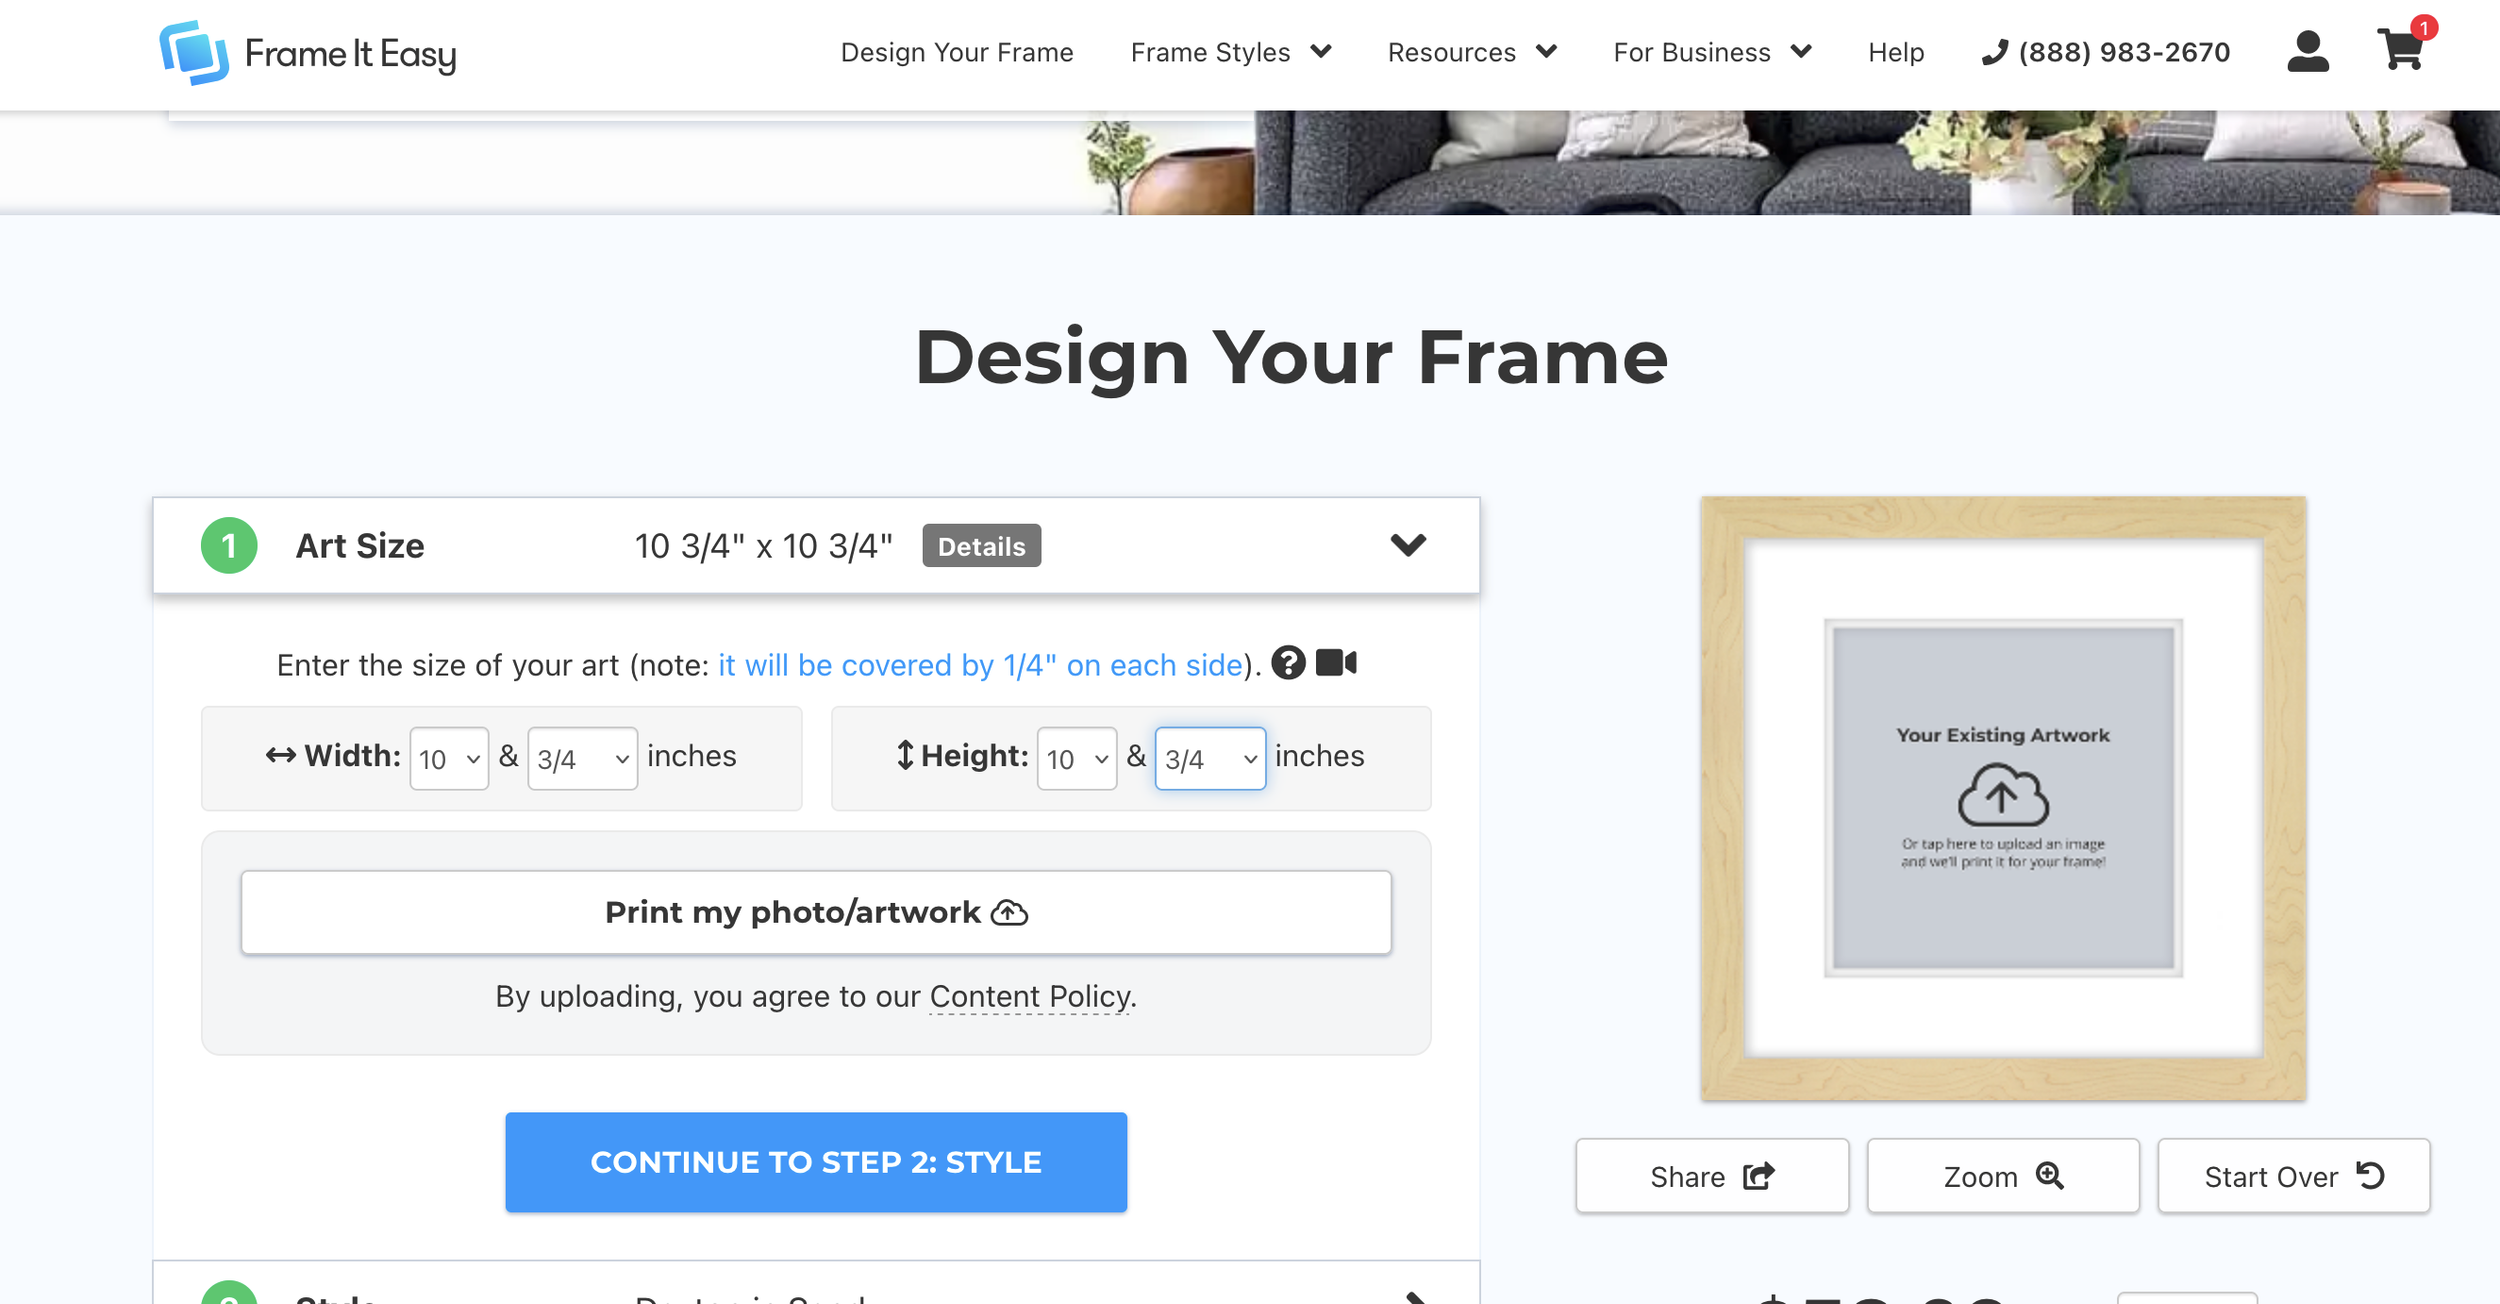
2. Now that your print is in the works, visit Frame it Easy’s website.
In the first box, include the size of the artwork you just purchased. It’s important to note here that the mat will cover ¼” on each side. For most work that will be fine, but if you want more white space, enter it a size larger.
(for example, if you ordered an 8”x10” print, you may want to enter 8.25”x10.25” for a little less overlap)
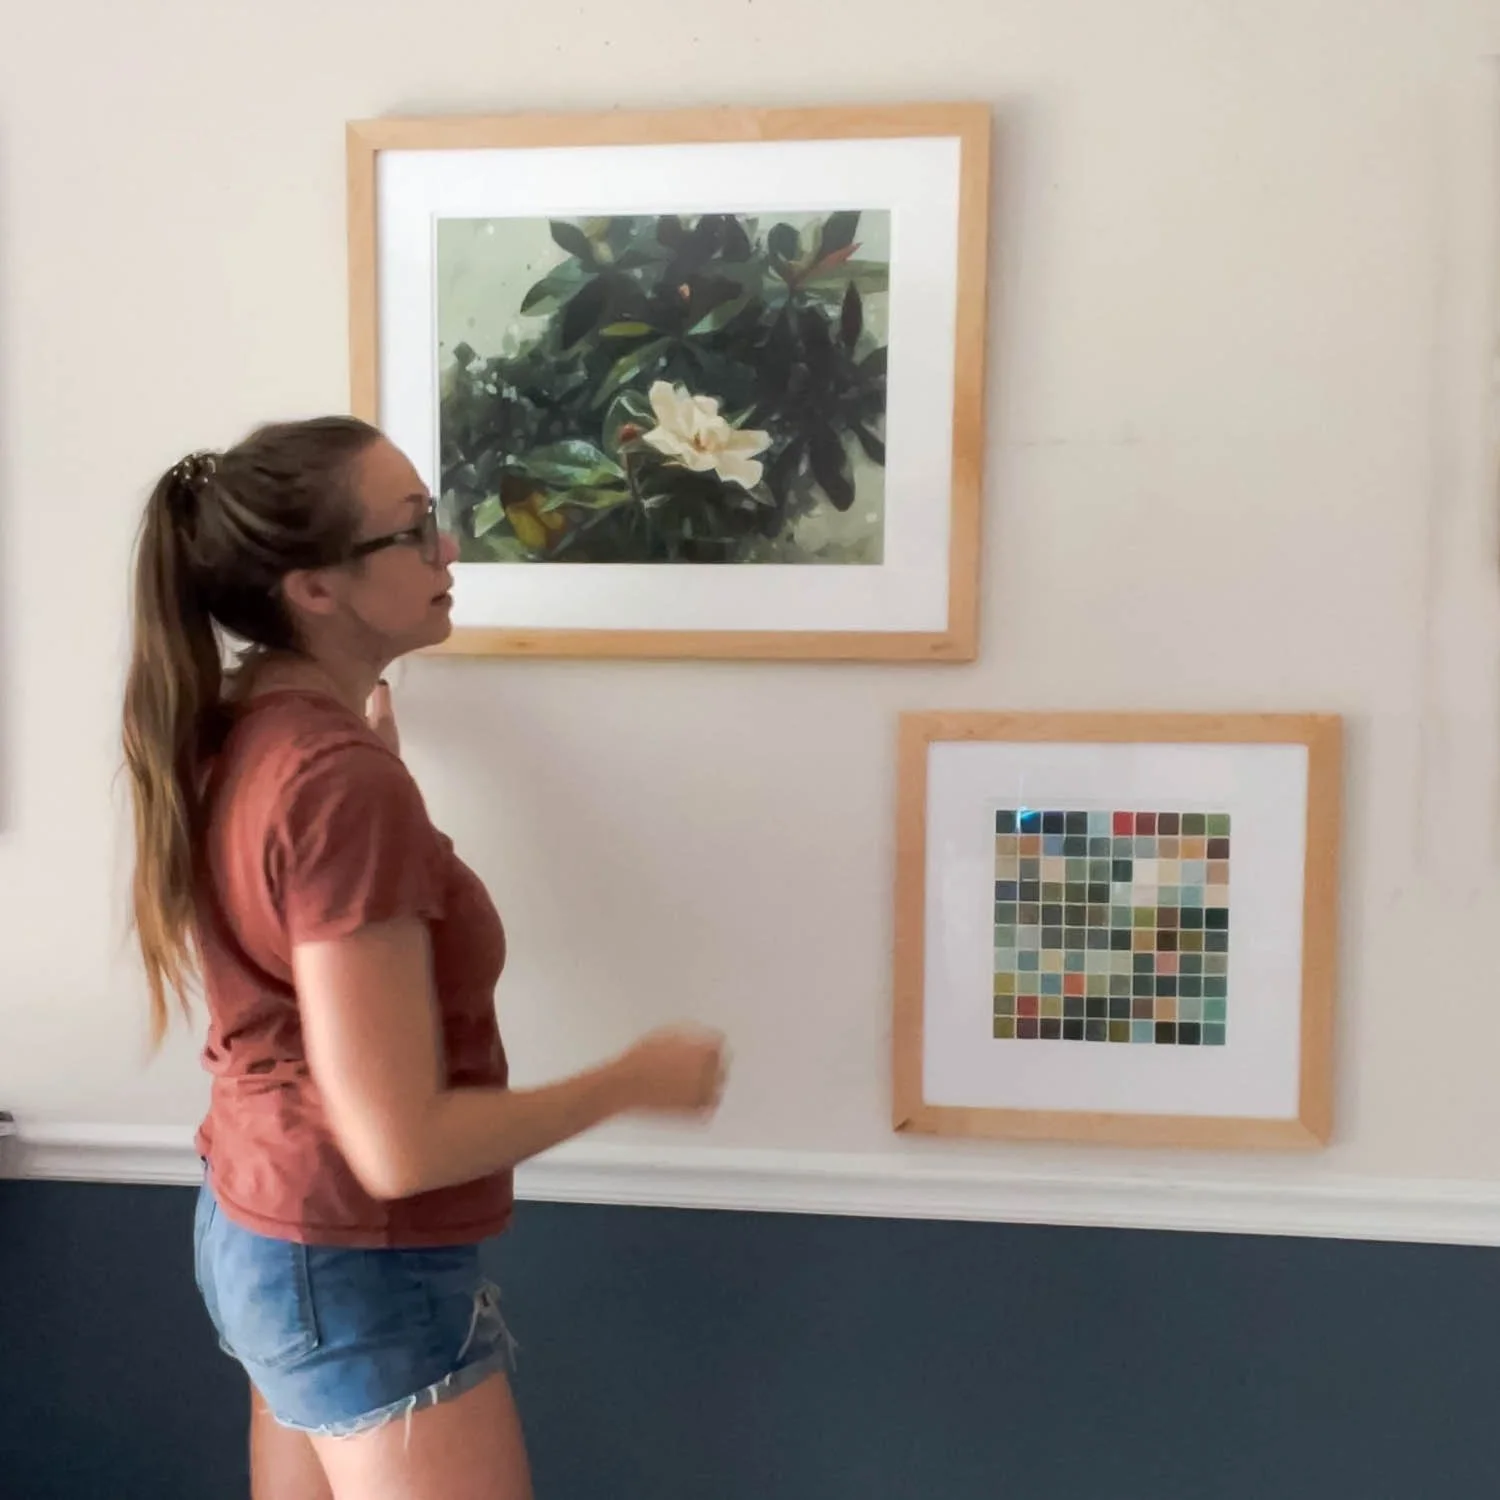
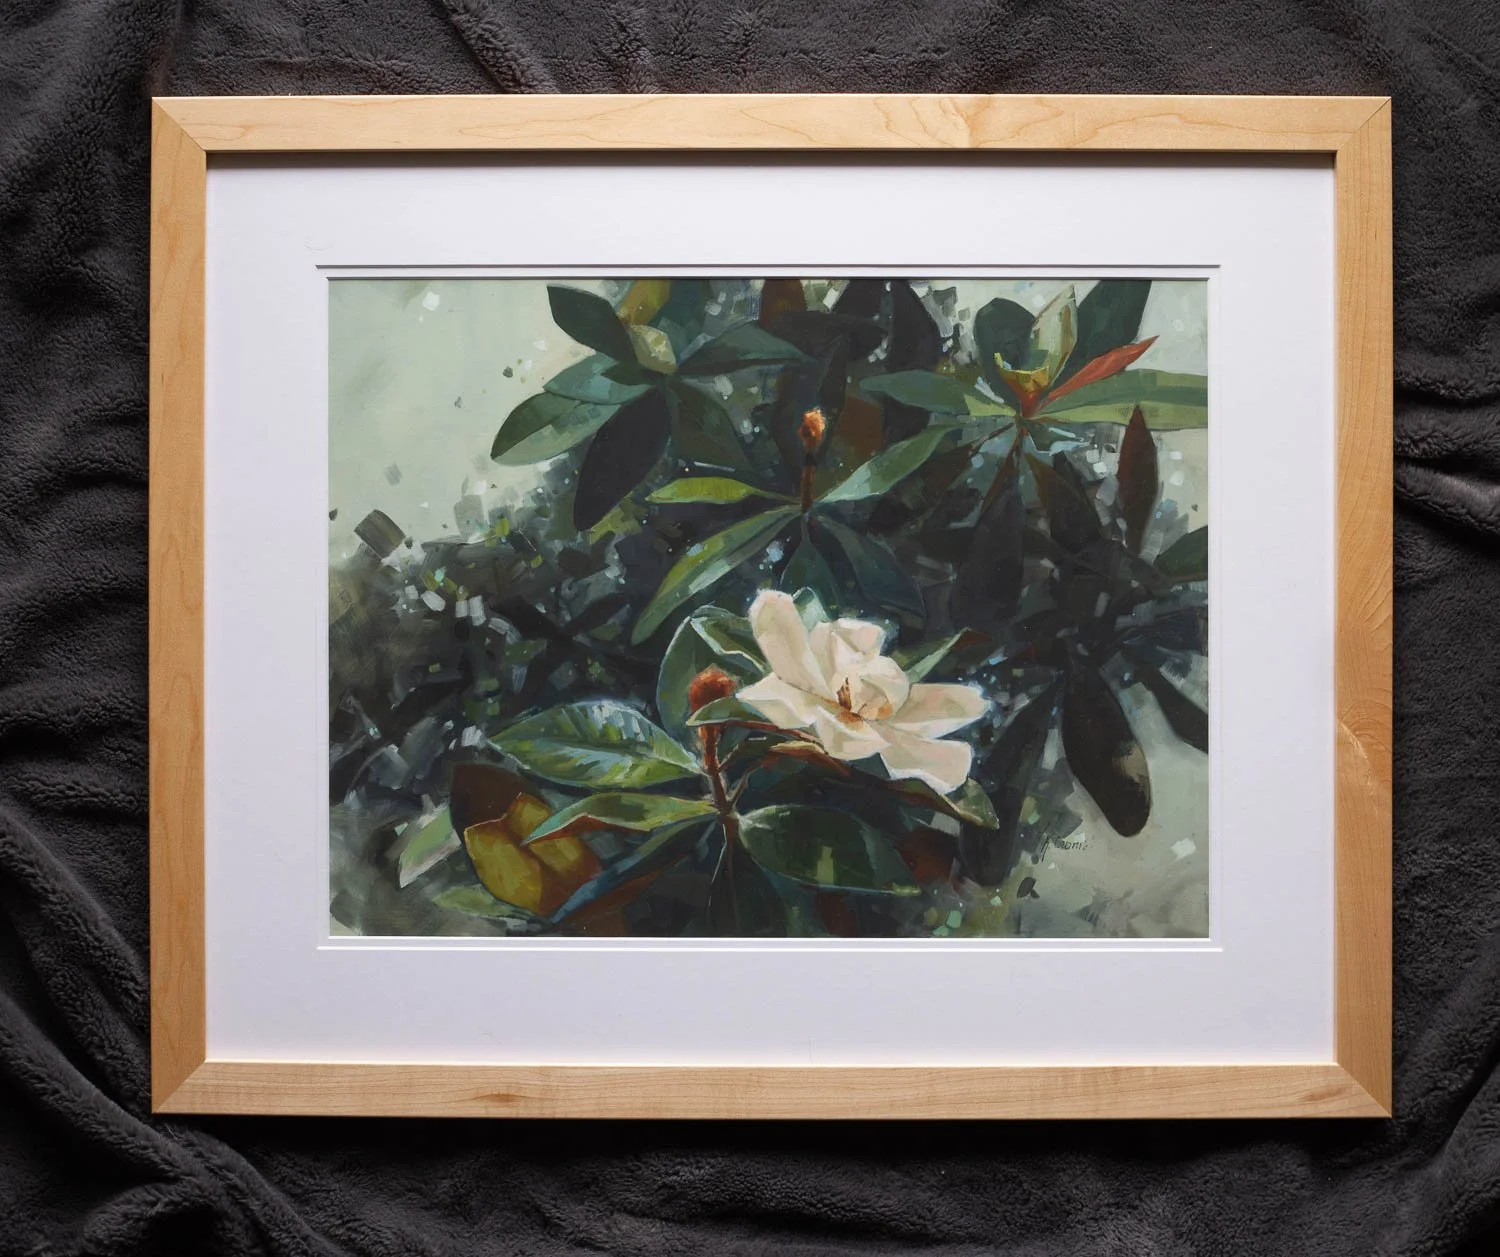
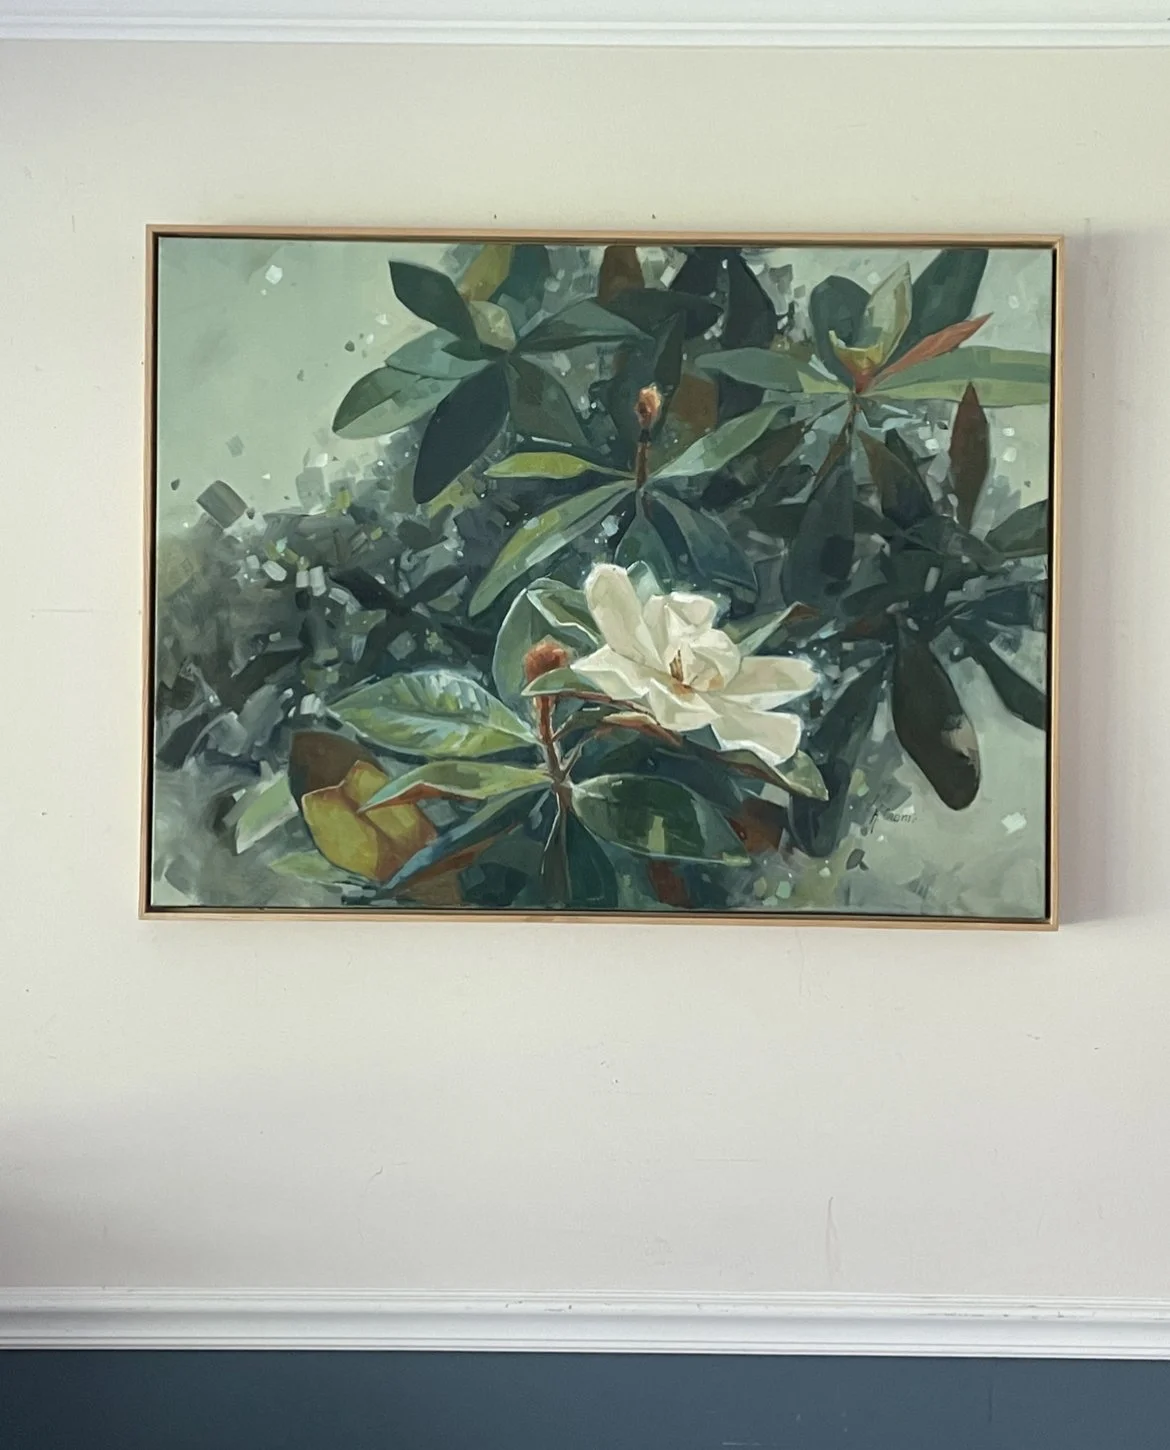
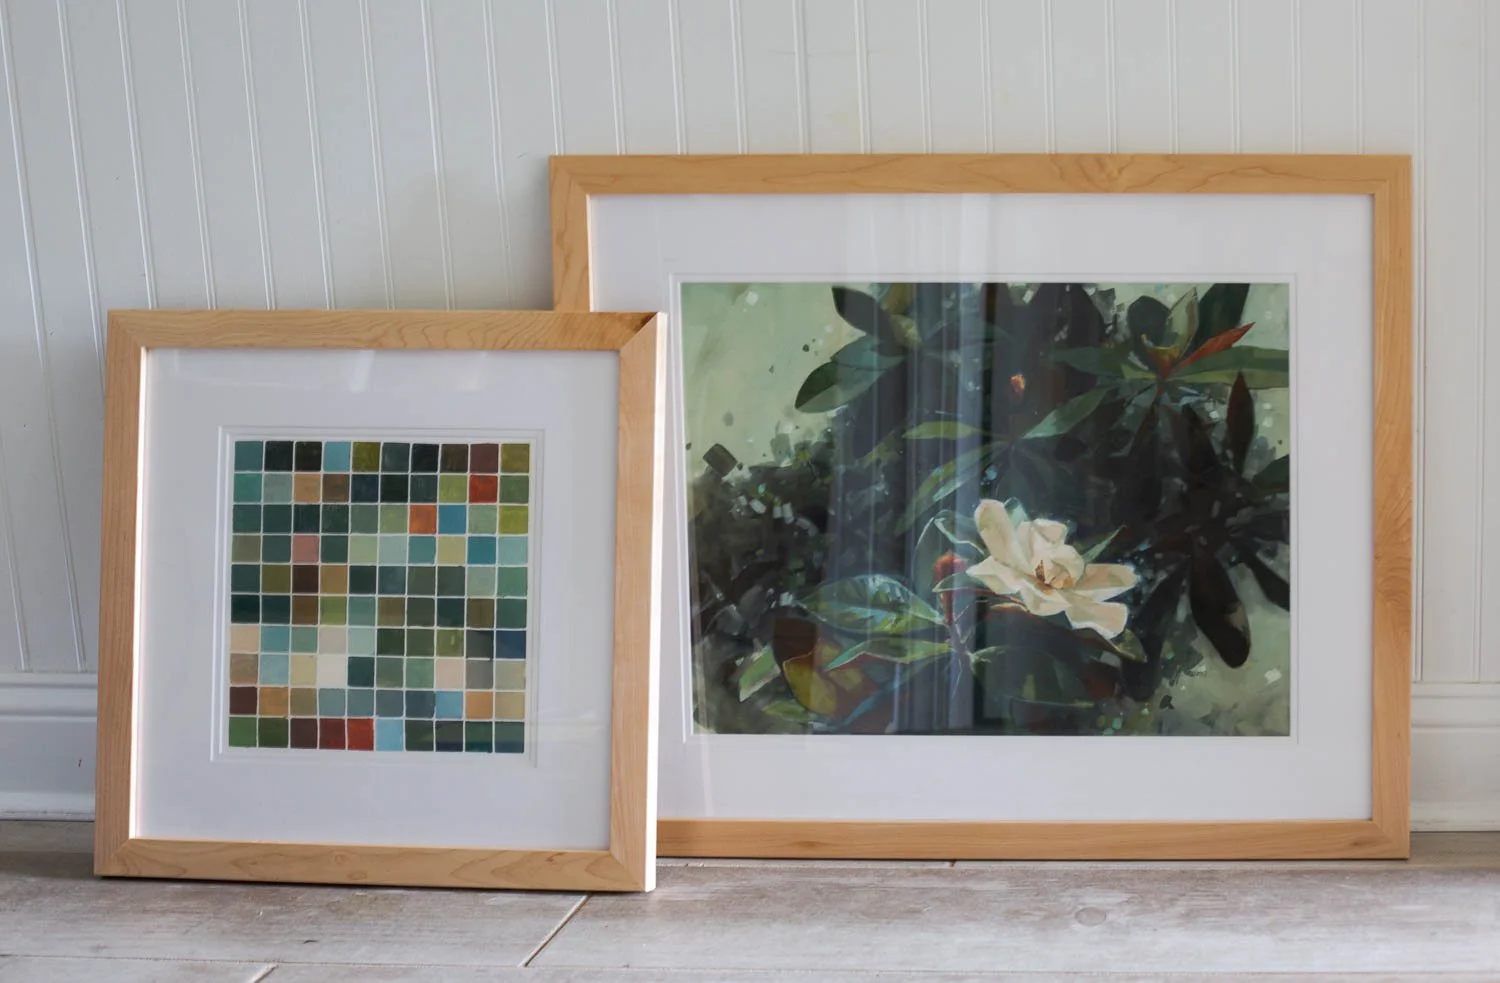
For the “Peace in your Season” print, I wanted a little less of the mat covering. The original print is 20”x15”, so I entered 20 1/4” x 15 1/4”.
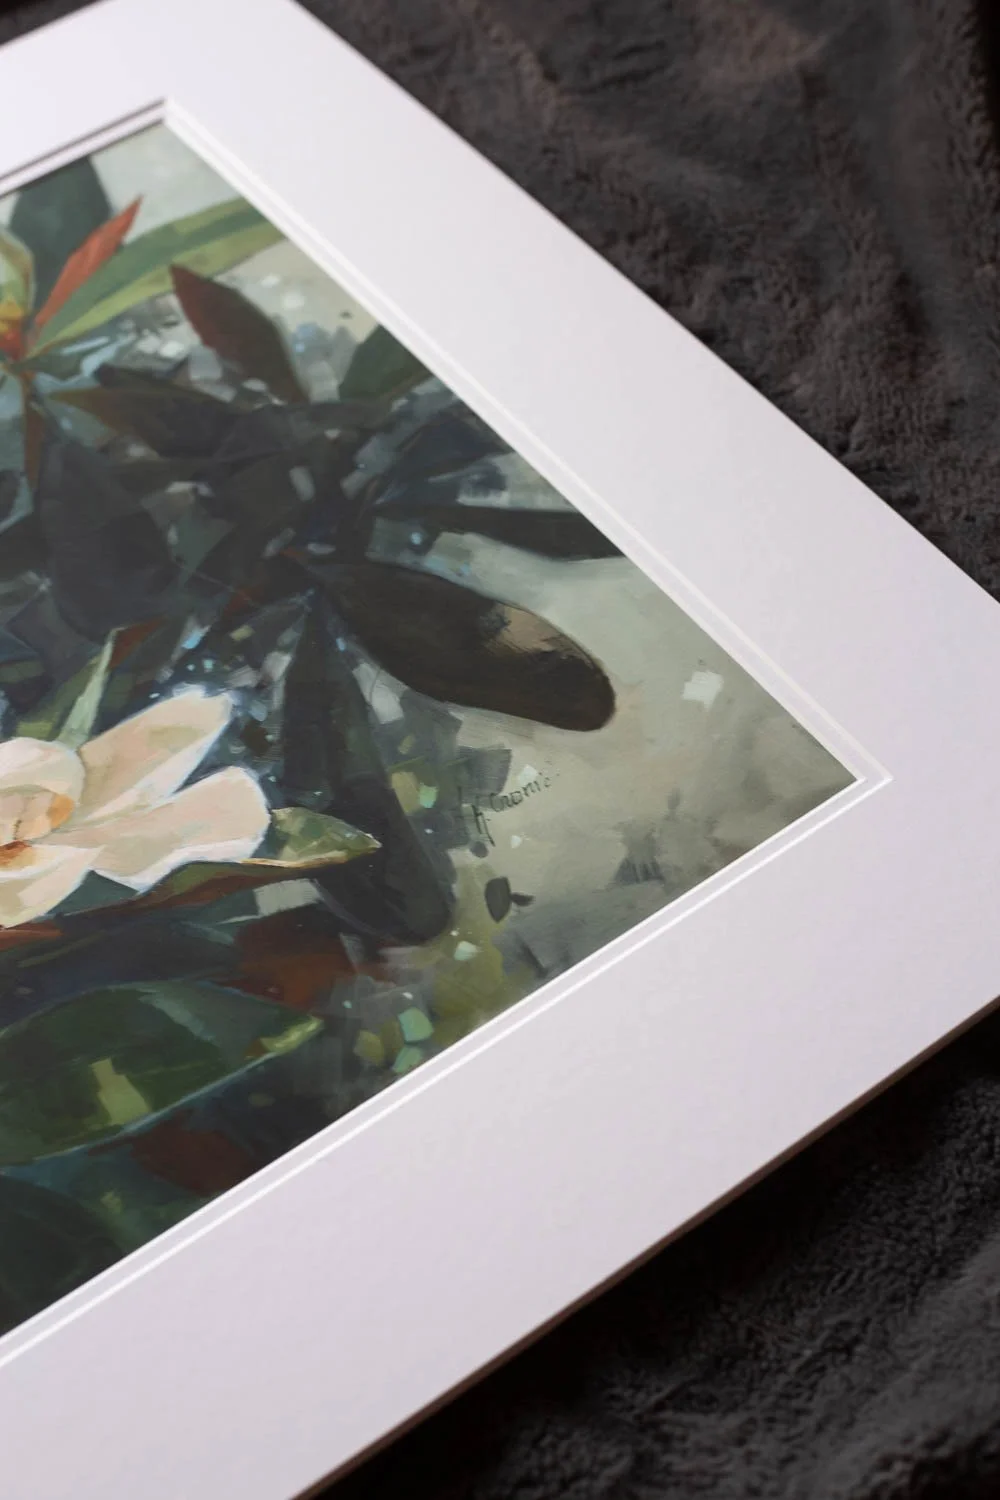
I am also framing the “Color Journal” print that is a companion to this painting. This one is 10”x10”, but I really want some of the white to show, so I’m leaving a little extra white space. I chose 10 3/4” x 10 3/4”. Since they bring the mat in 1/4” on each side (or 1/2” total), this leaves another 1/4” to split on the sides (1/8” each).
3. Select your frame and mat!
I love the sand colored frame with this print, and the clean yet sophisticated look of the double white mat. I also chose the outer mat to be 2.5”, it adds great presence to the piece.
4. Select your covering.
Since I am using a mat, I am sticking with the suggestic acrylic cover. I pretty much always select that option!
5. Complete your purchase
(use this code for 10% off!) and wait for shipping info to be emailed to you in 2-4 business days.
Meanwhile….
Go for a walk!
〰️
Make homemade pizza.
〰️
Watch your favorite show.
〰️
Take a nap!
〰️
Go for a walk! 〰️ Make homemade pizza. 〰️ Watch your favorite show. 〰️ Take a nap! 〰️
Hooray! Mail arrived! Here’s what you do next.
What you’ll need:
Scissors for opening the box
Acid Free tape
A screwdriver*
Hammer (to nail in the wall hook!)
*for some metal frames
Steps to Frame Your Print
1. Wash your hands (or wear gloves!)
This helps keep any unwanted dirt from damaging the piece or mat. (Mats must be very charismatic, they attract everything)
2. Carefully open their very well packaged frame.
When you open the box, you will find the frame gently arranged with extra coating over the acrylic cover as well as the mats facing inward for added protection. There will be a wire loosely attached on one side.
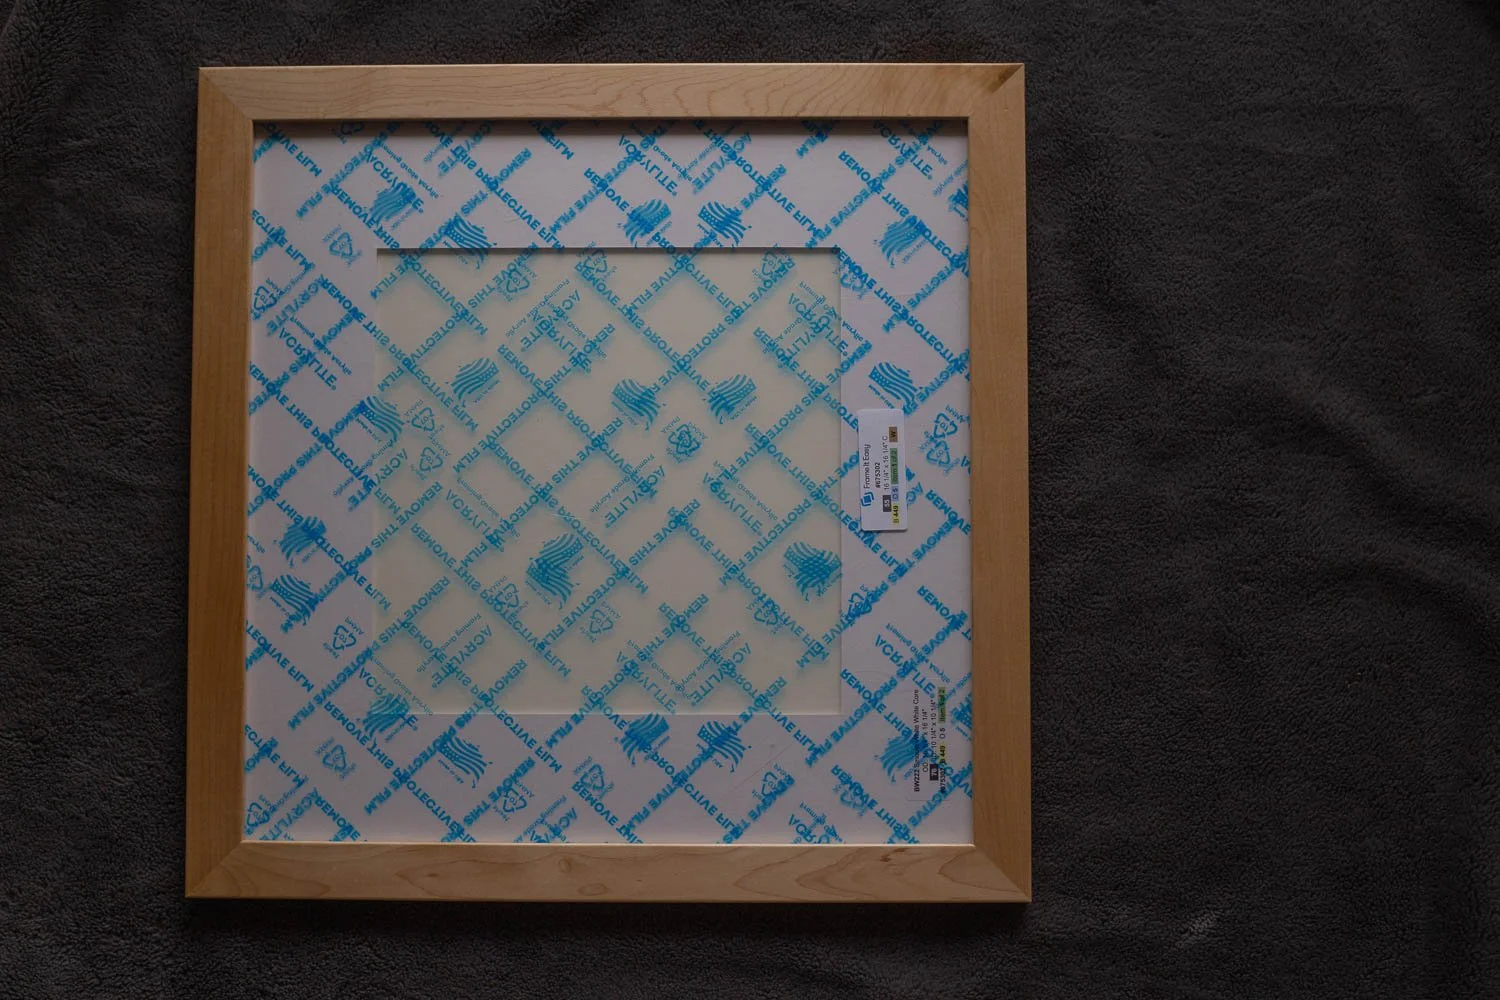
The frame will look like this when it comes out of the box.
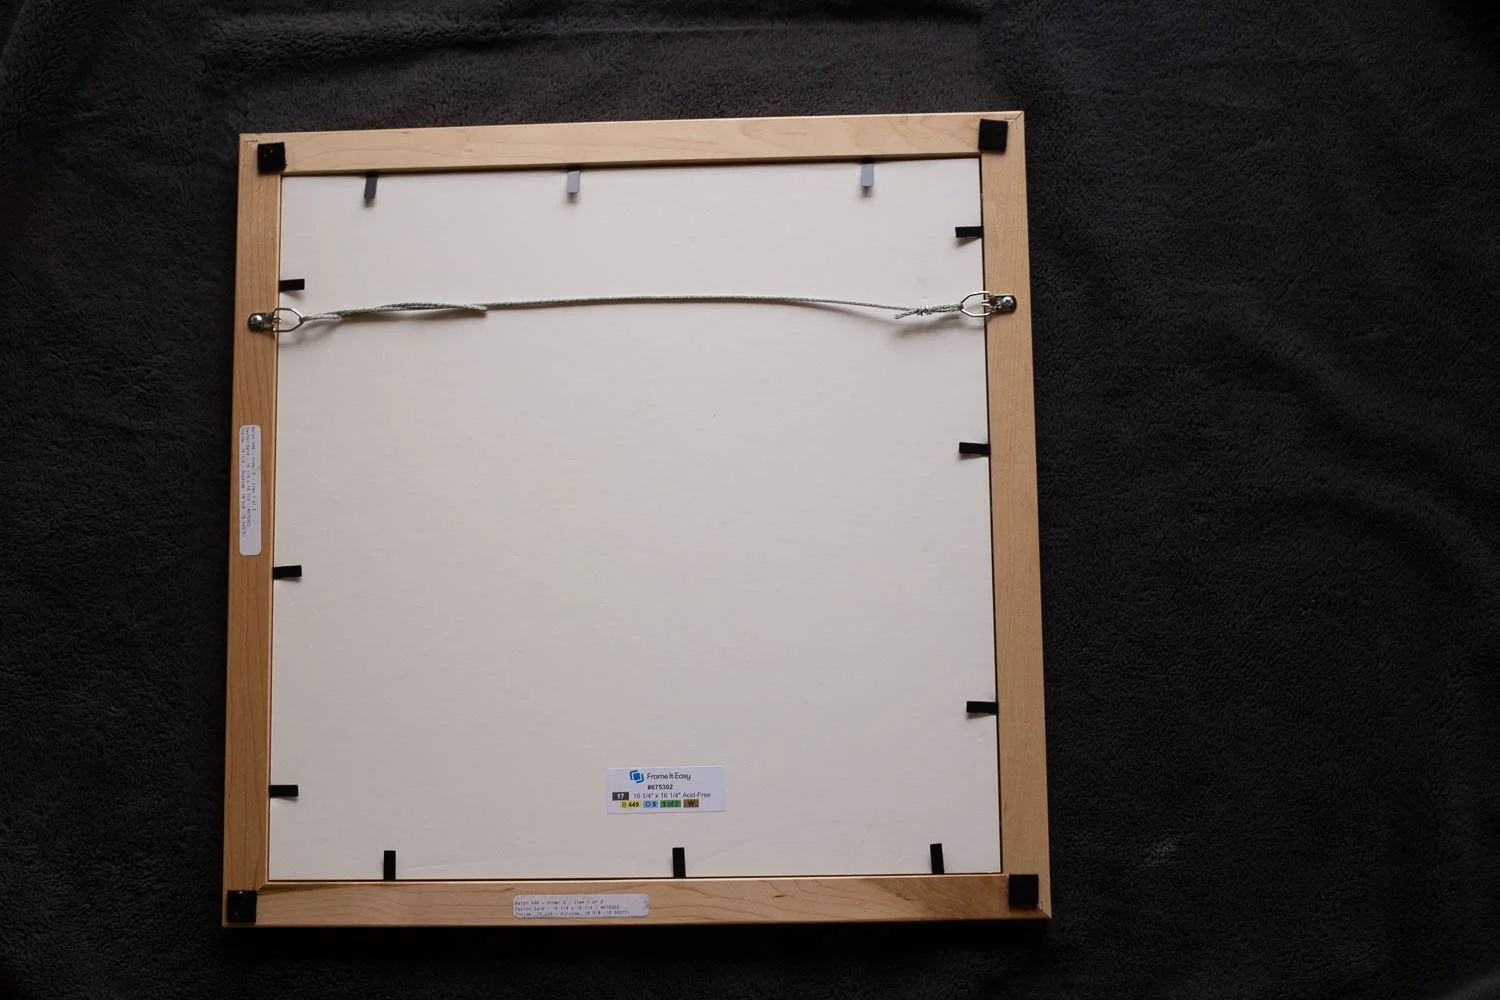
(Back) The frame will look like this when it comes out of the box.
3. Assemble if necessary.
Since I selected wooden frames, there is minimal assembly required. Metal frames need a tad more, but the instructions that come with them are pretty intuitive!
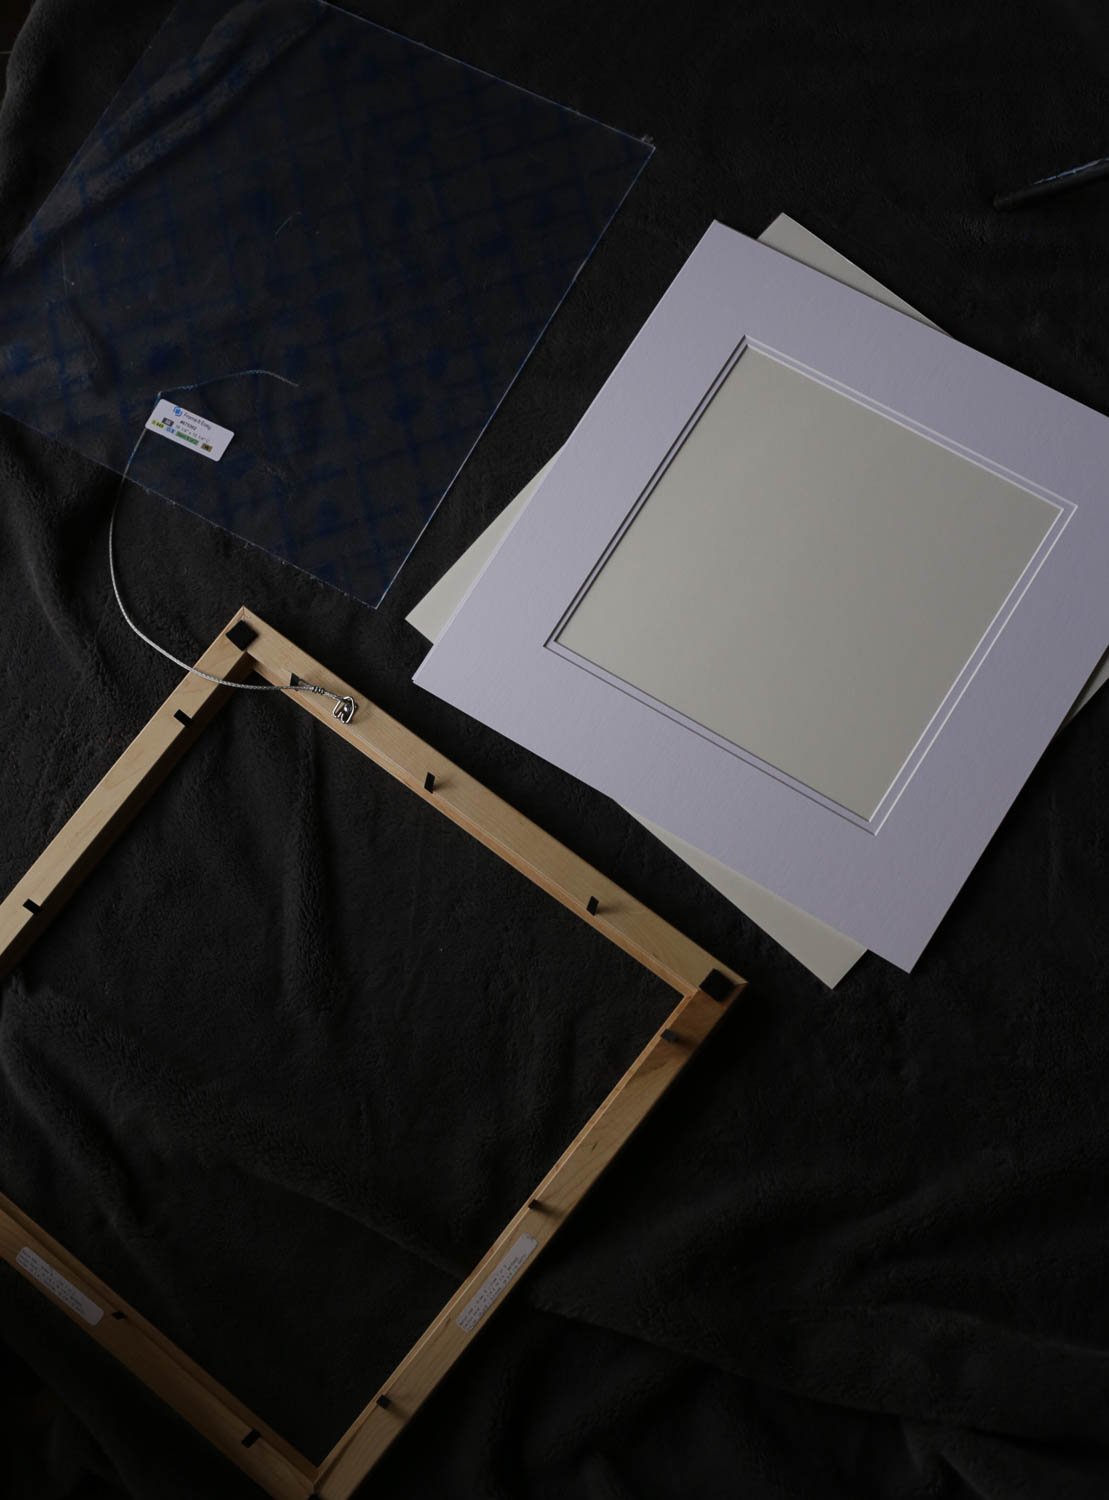
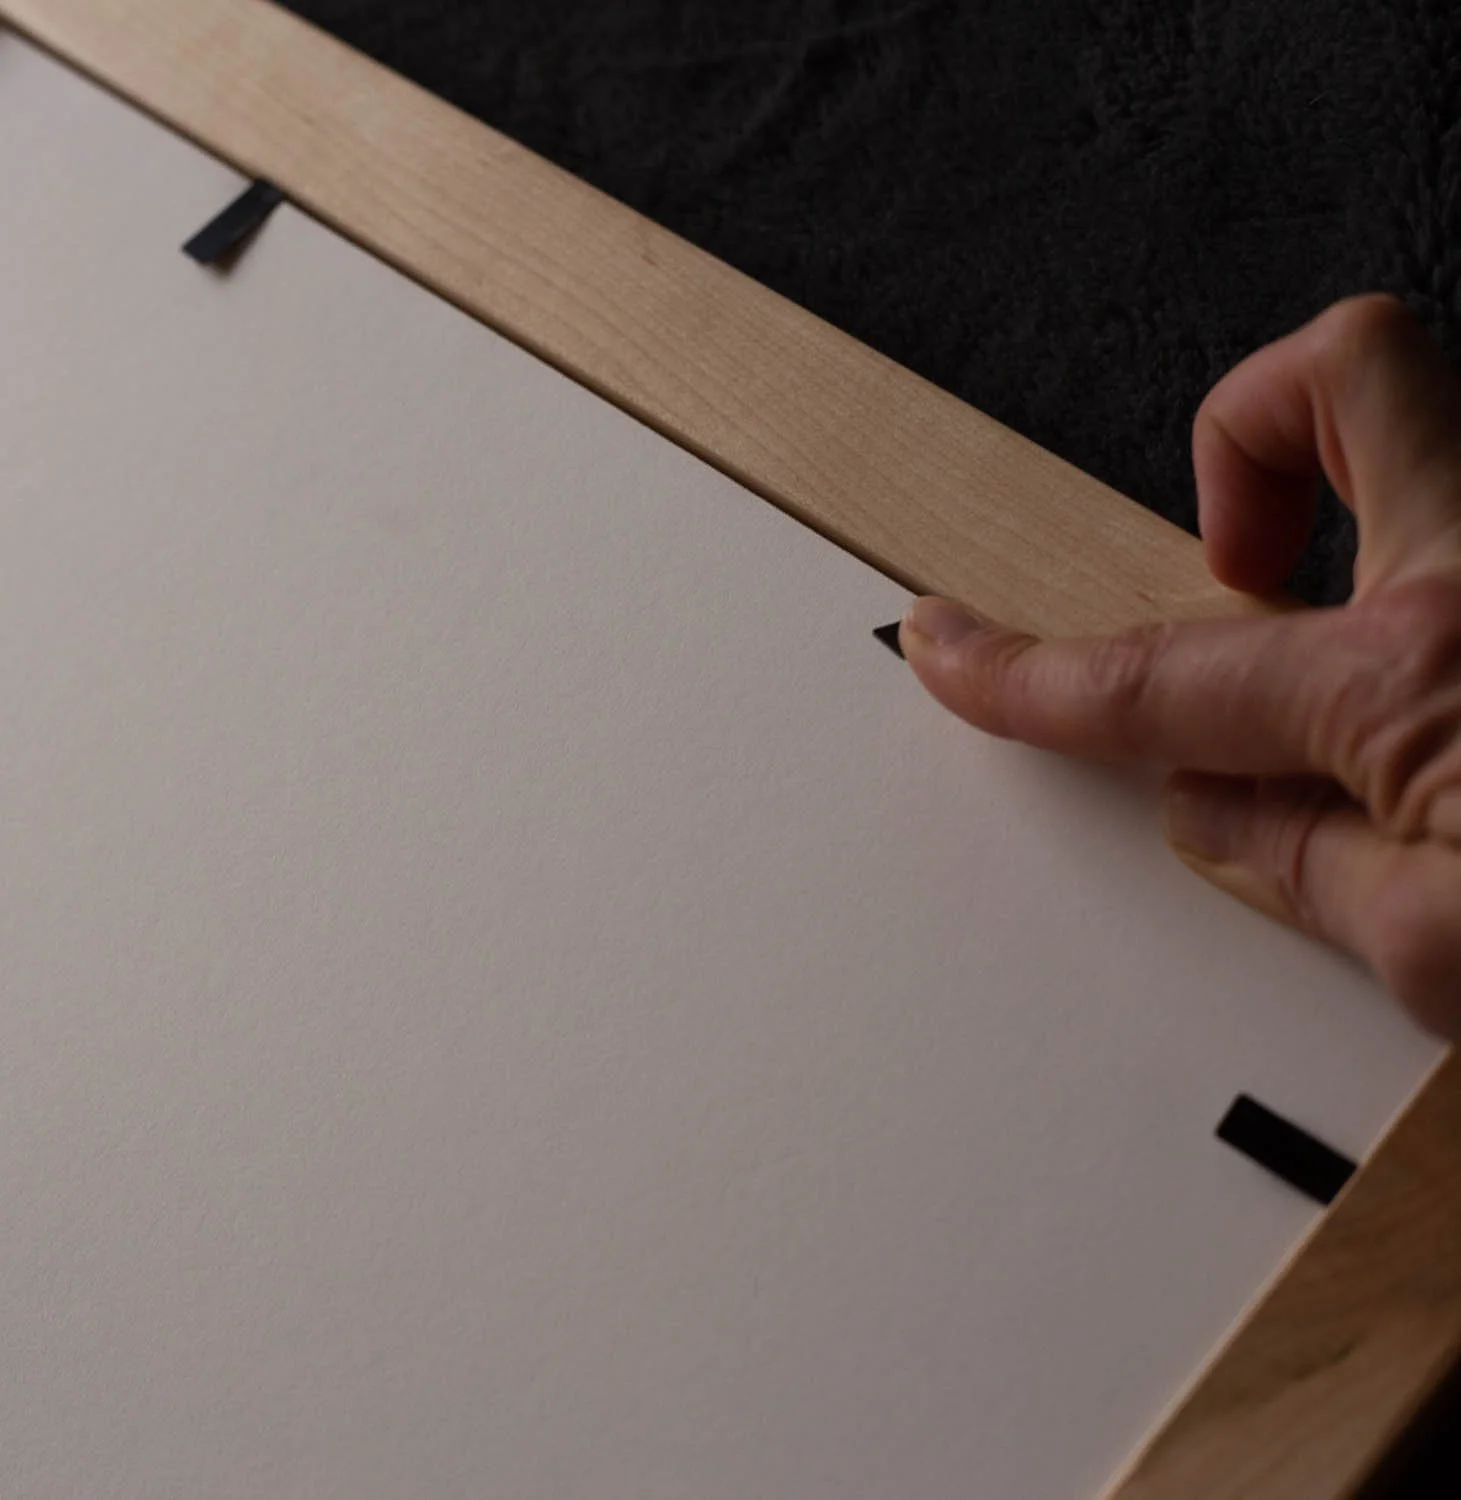
4. Open the frame and lay out each piece.
If you have a wooden frame, use your fingers to bend back the flexible tabs. Carefully lift out the acrylic cover, the backing board, and the mats, which will be facing in for added protection.
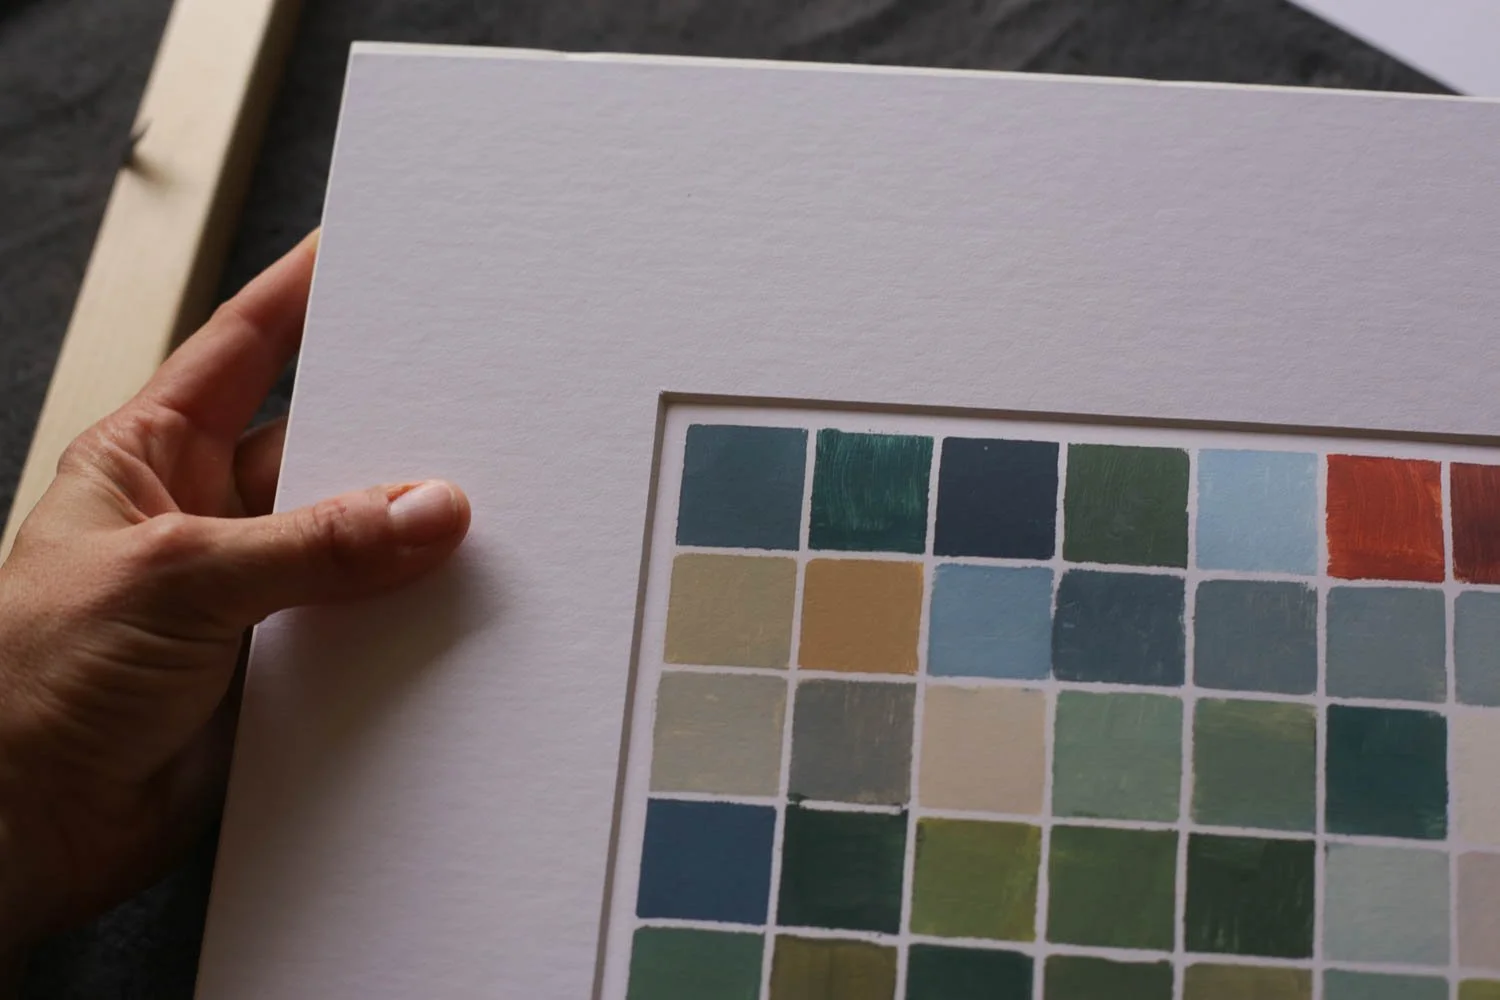
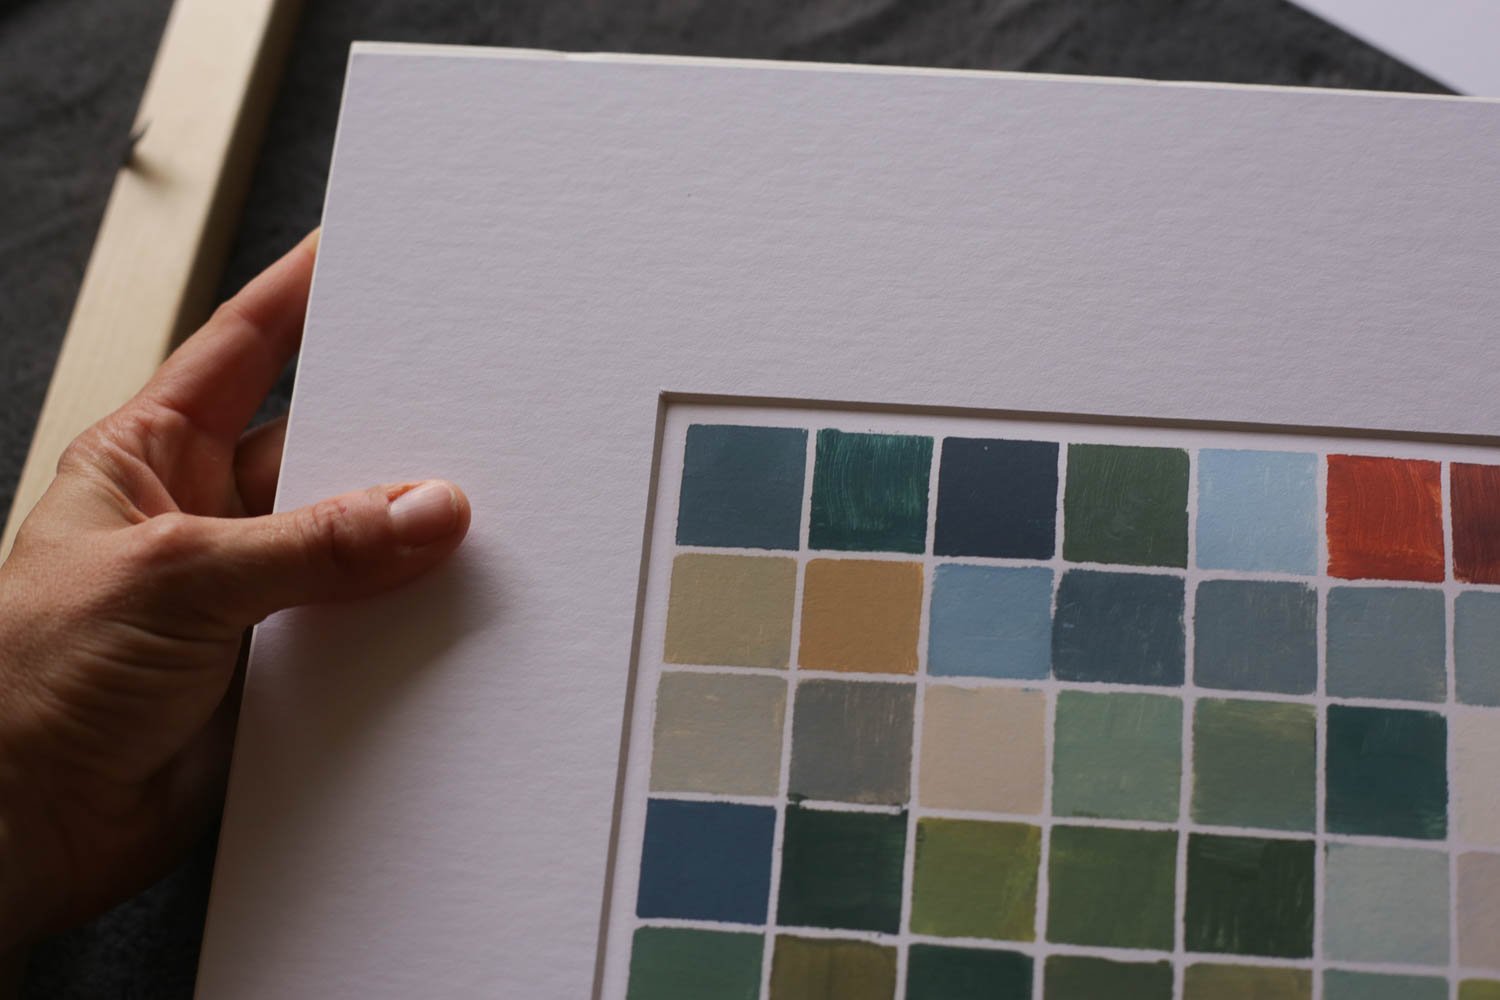
5. Fit the print to the mat
Turn over the mat and backing board, laying your print on the surface. Using acid free tape (such as this!) , line the upper edge and corners with tape and center the lower mat. Secure with gentle pressure and arrange the top mat.

6. Arrange the Acrylic Cover On Top
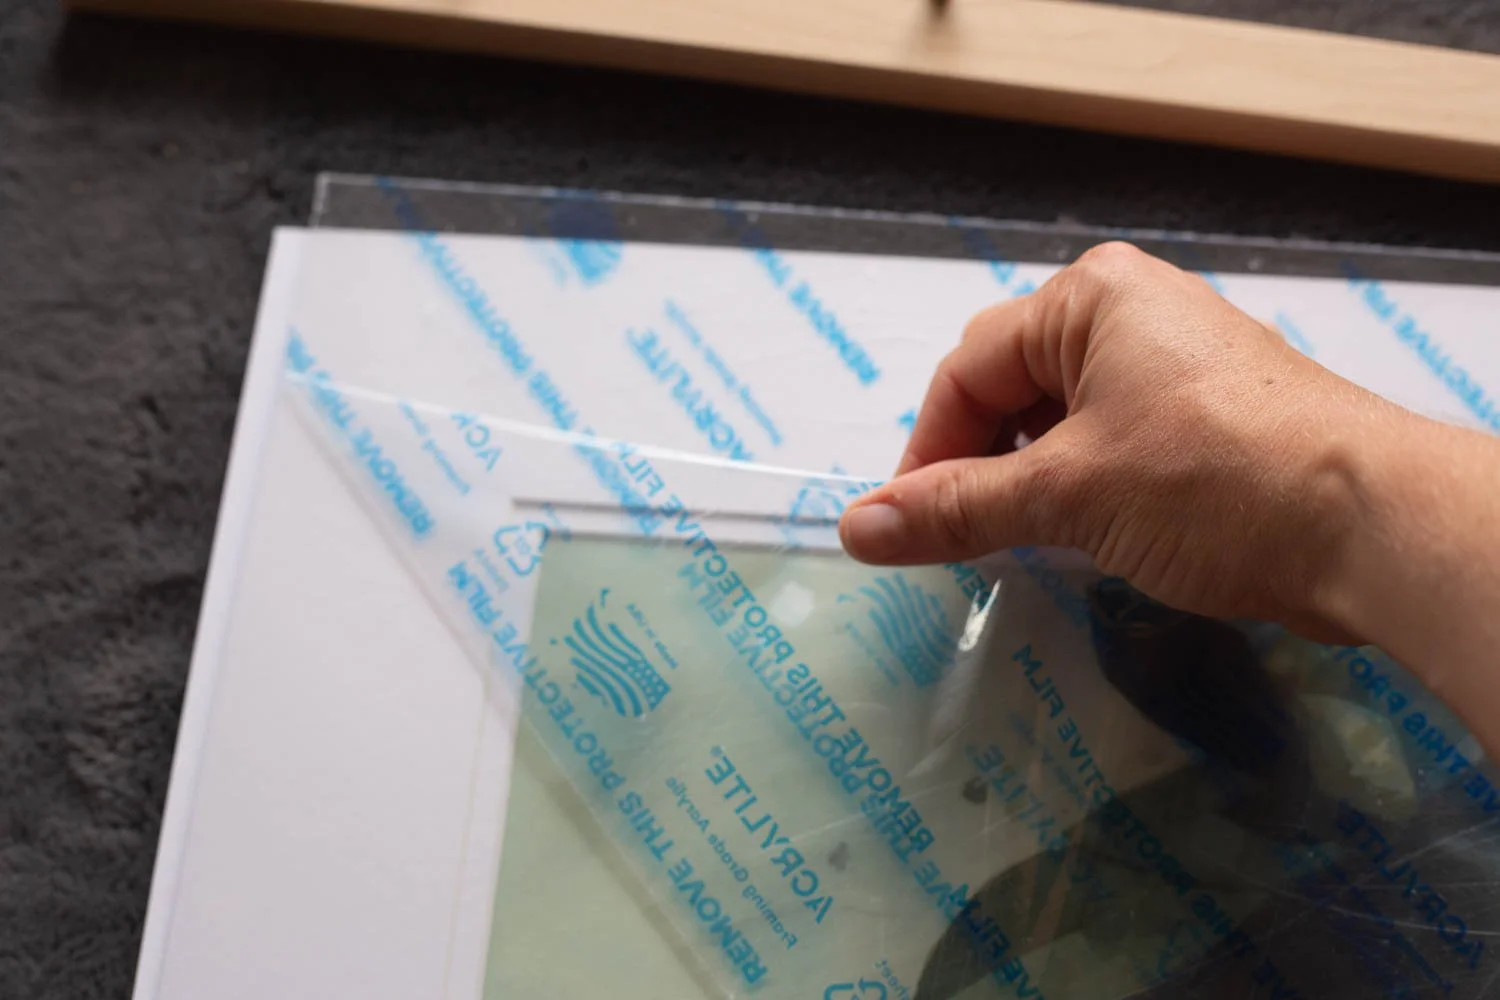
Carefully peel off the coating on the acrylic cover on both sides. I like to save this until the end to minimize any dust or pet hair, keeping the cover as close to the print as possible. Arrange and secure back into the frame by bending back the tabs.
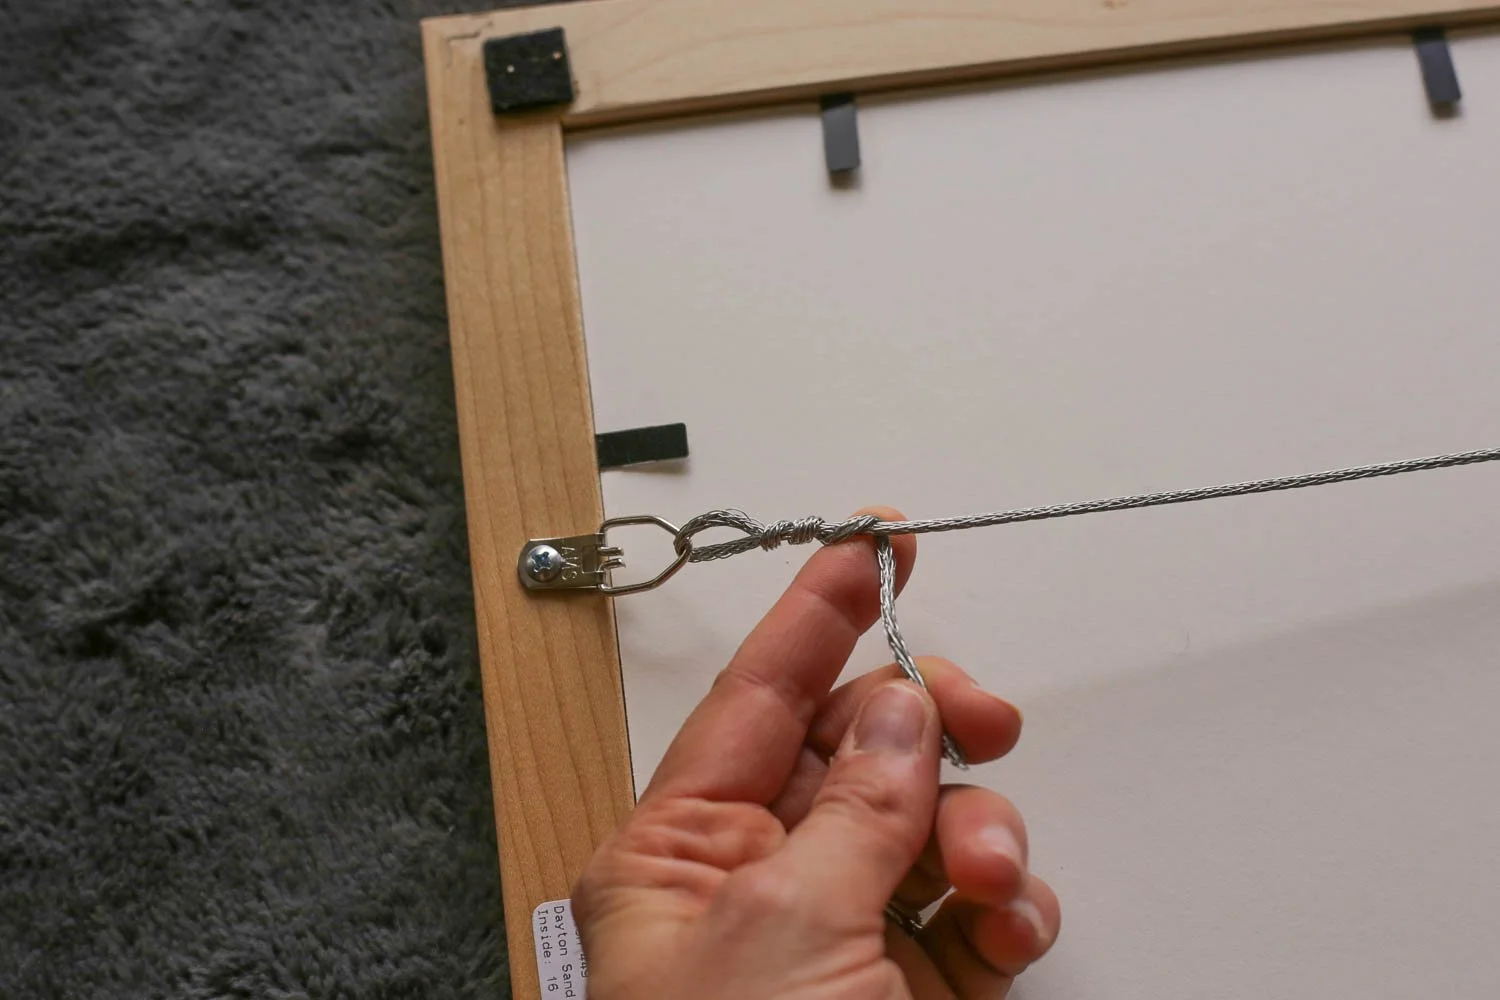
7. Secure the Wire
Frame it Easy secures the wiring D-rings for you, so all you have to do now is reinsert the wire, and with a few twists, you are ready to hang!
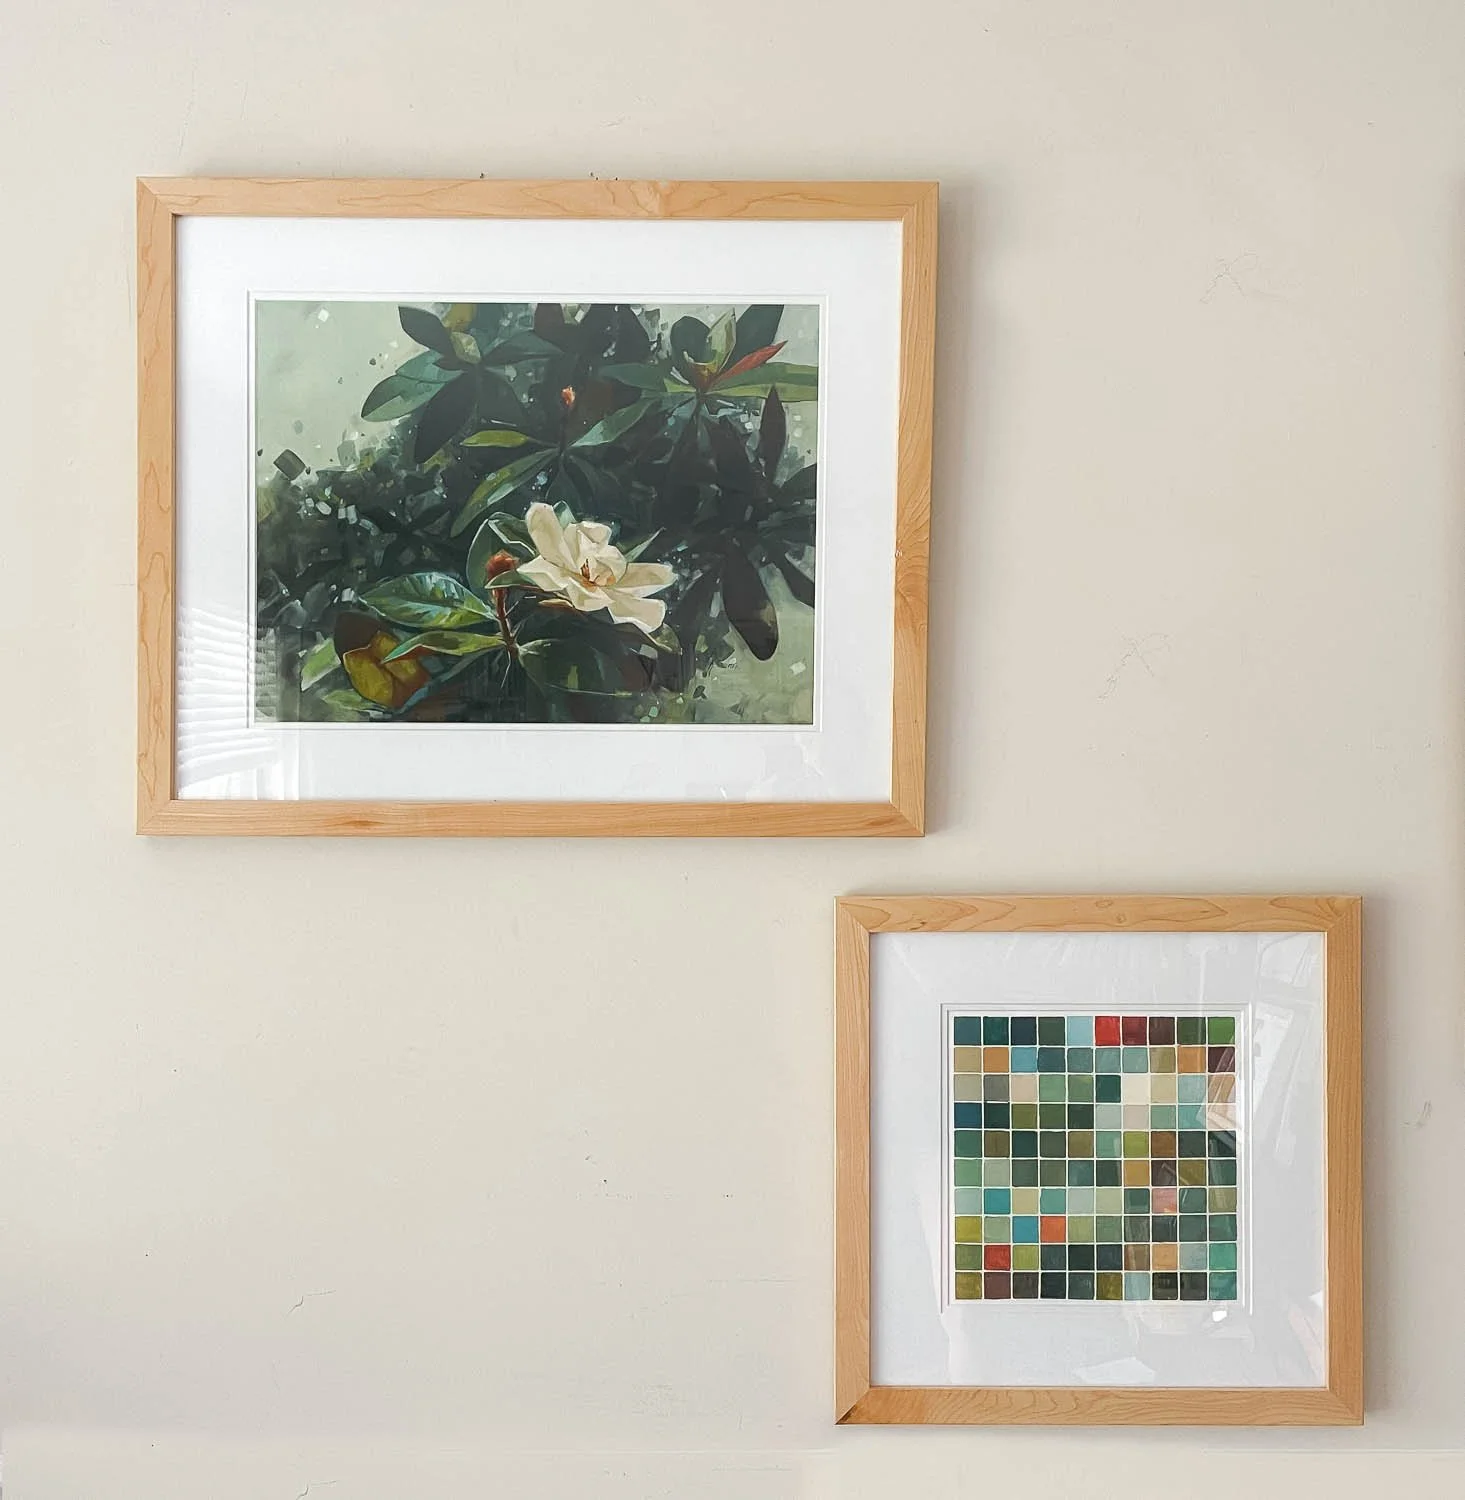
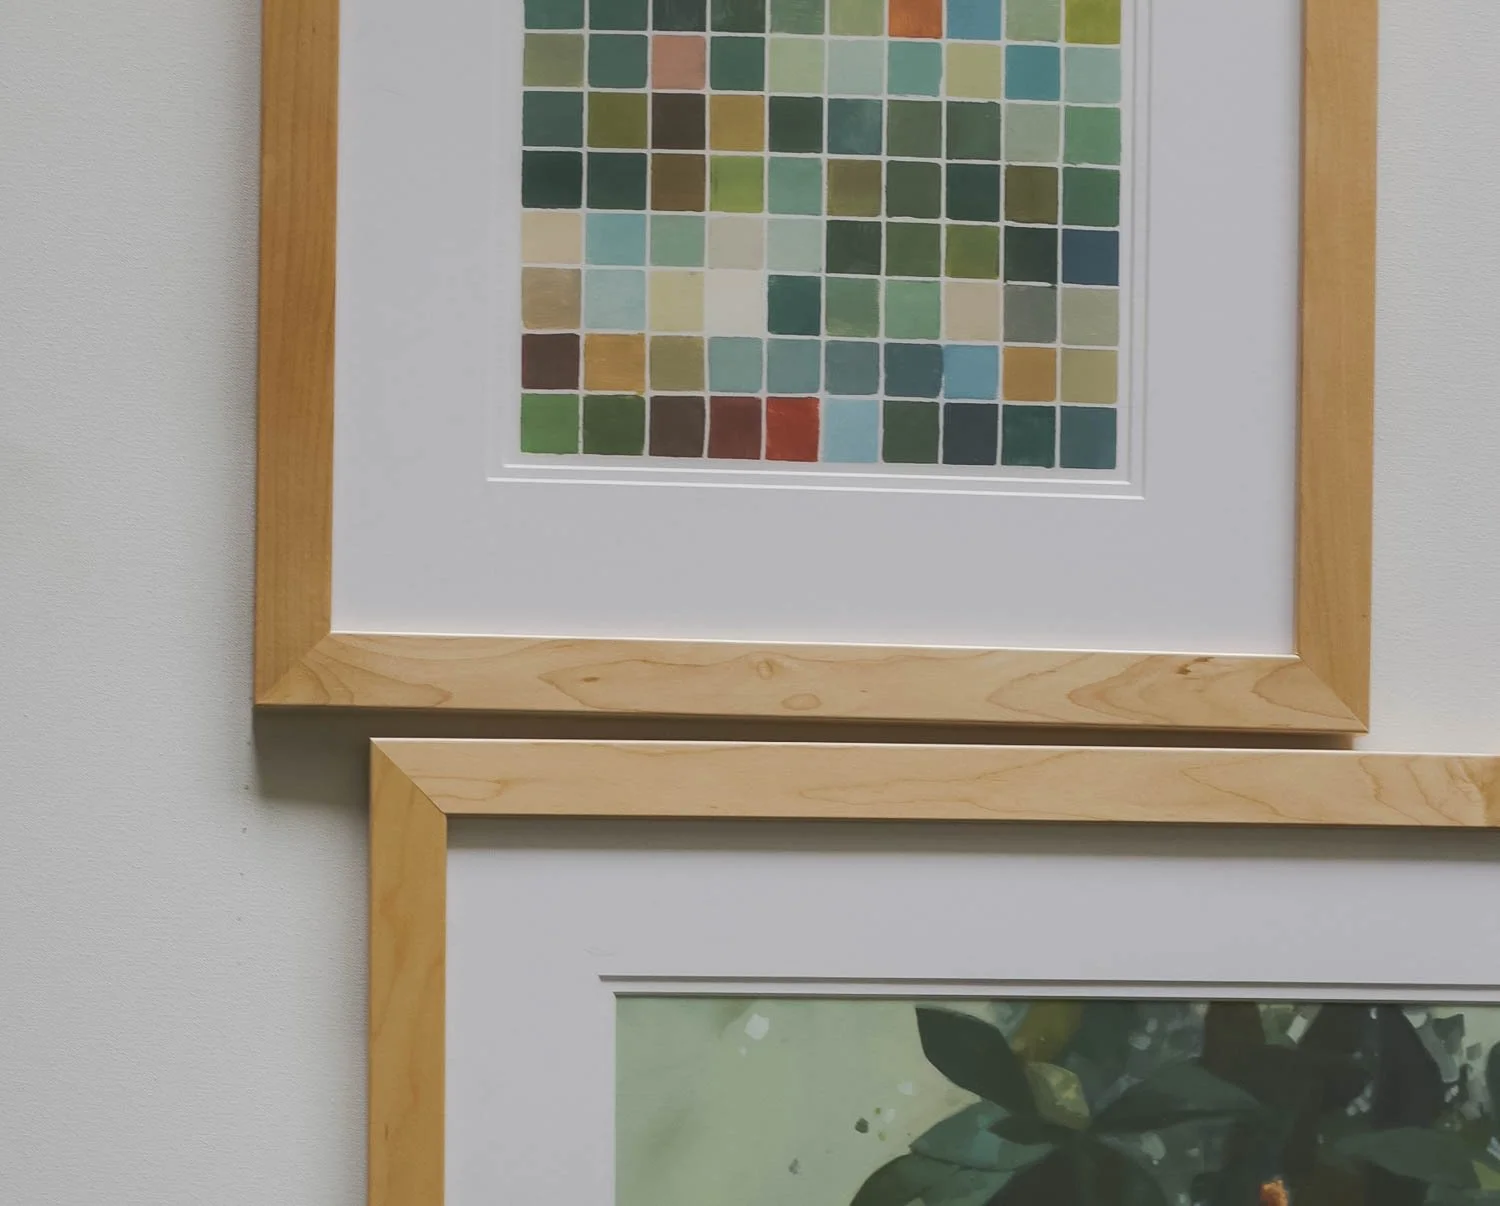
Love these prints? Shop them here!
Get 10% off for frames at Frame it Easy.